


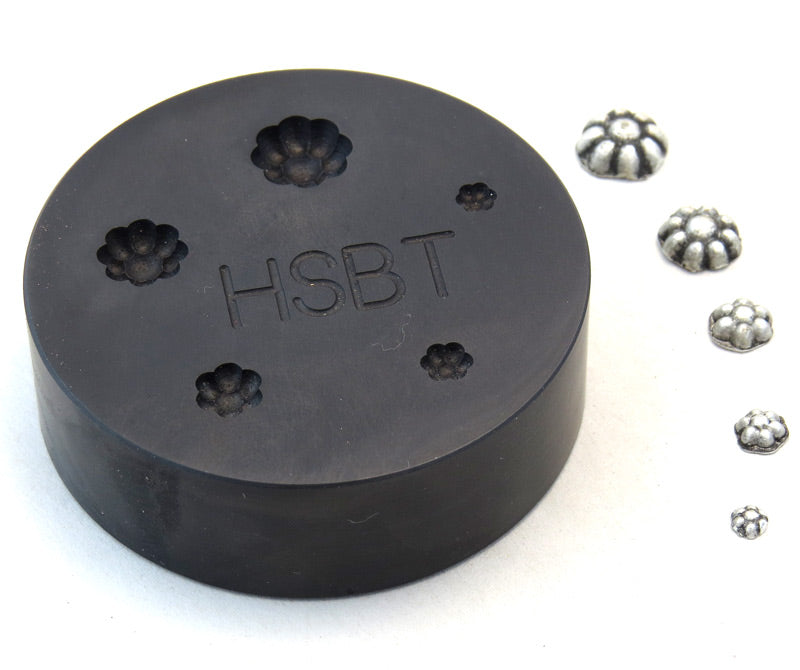

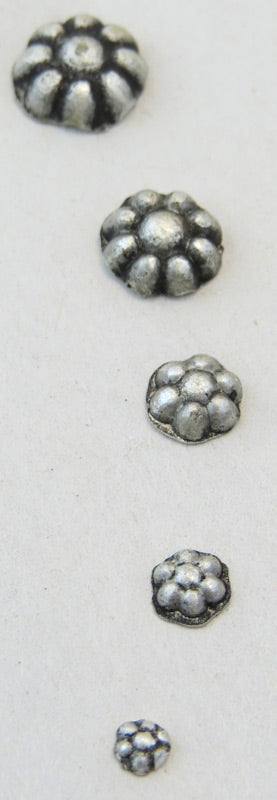
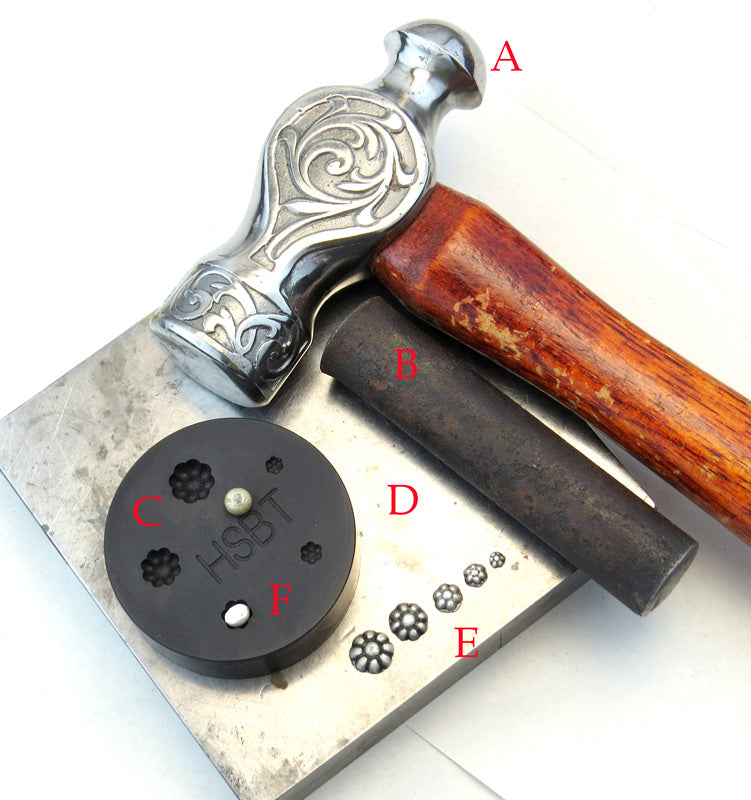
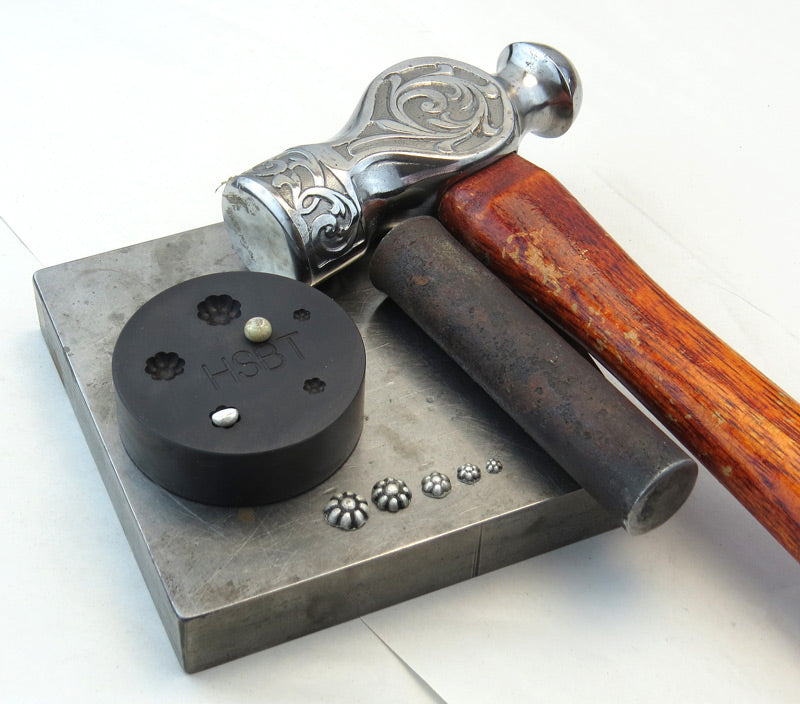
SKU-010122- There is a How To Use video below- the handmade Berry Bead Shot Plate from Horse Shoe Brand represents a new effort for us in making hard to find tools for the Bit & Spur Maker as well as western silversmiths in general. YES- its black because of heat treating this piece of tool steel. Removing the black on the surfaces just costs YOU money, but more, removing the black from down inside the tiny cavity's of the designs just leaves them less sharp and accurate. Anyone looking at old western jewelry and saddle silver components will recognize the very popular Berry Bead style design. We have a plate here with 5 sizes, 3/8 the largest, 5/16, 1/4, 3/16 and 5/32. Sizes for everyone, at least that was our intention, from small jewelry to full sized saddle silver. HOW TO USE IT- ALWAYS LUBE THE PLATE RECESSES BEFORE USING. we will do a video when we get a few moments but it goes like this. Melt scraps of silver on a charcoal block, random sized bits of silver giving to random sized little flat bottomed silver, brass, copper, nickle balls ***NOT FOR STEEL, whack steel balls in it and you own it PERIOD*** You will need a good striking hammer such as item A #67-5177 as shown, you will need a 2 lb hammer for the 2 largest sizes of beads. Item marked B- is simply the pusher or forcer. It is a 3/4" dia steel rod, please note that the end you set on top of the silver ball is NOT FLAT- it is actually a slight radius and not a real high polish so that the ball is driven down and not outwards. Item C is the Berry Bead Shot Plate. Item D is a steel bench block for the pic, but I use a 65 pound rectangular bench anvil, you want some heft under it to absorb the blow. Do not use a rounded rail road track it will ruin your bench block. Item E shows you the finished 5 sizes of Berry Bead you can make. Item F shows you 2 small melted silver balls set in cavities with flat side facing up like we recommend. Lubricating the plate makes life so much easier, generally I can tip the plate over on it's side and give it a tap with the hammer and the bead falls out. But sometimes a bead can be a problem to get out, so in that instance use a 1/32 nail set from the hardware store and tap it into the bead at it's center on the backside, and lift the bead out that way. The better you fit the ball size to the impression hole, the less cleanup you will have. Note that the ball chosen should ALWAYS stand higher than the top of the Plate surface- never flush. Solder it to a nail or a copper rivet, even to the end of a piece of copper wire or chicago screw and you are ready.